singer sewing machine operation manual
Singer Sewing Machine Operation Manual: A Comprehensive Guide

This manual, dated 12/16/2025, provides essential guidance for operating and maintaining your Singer sewing machine, ensuring successful projects and longevity.
It’s your partner, offering safety information and detailed instructions, including resources like online manuals and the official Singer website for support.
Welcome to a comprehensive journey through your machine’s features and benefits, starting with understanding its core components and basic techniques.
Welcome! This section initiates your journey with your new Singer sewing machine, a reliable partner for countless creative endeavors. As of December 16, 2025, this manual serves as your primary resource, guiding you through operation and maintenance.
Singer machines are renowned for durability and versatility, and this guide unlocks their full potential. We’ll cover everything from initial setup – winding the bobbin and threading – to mastering basic and advanced sewing techniques.
Consider this manual your trusted companion, offering safety precautions and troubleshooting tips. Explore online resources and the official Singer website for additional support and a thriving community. Your success is our priority!
Safety Precautions & Important Information
Prioritize safety! Before operating your Singer sewing machine, carefully review these crucial precautions. Always disconnect the power supply before performing any maintenance, like cleaning or changing the needle. Keep fingers away from the needle while sewing – serious injury can occur.
Never force the fabric; let the machine feed it smoothly. Ensure the area around the machine is well-lit and free of obstructions. This manual, current as of December 16, 2025, emphasizes responsible operation.
Children should never operate the machine unsupervised. Regularly inspect the power cord for damage. Refer to the official Singer website for comprehensive safety guidelines and support resources.
Machine Components & Identification
Familiarize yourself with your Singer sewing machine’s key components. This manual, updated December 16, 2025, aids in understanding each part’s function. The spool pin securely holds the thread spool, while the bobbin winder prepares the bobbin for seamless stitching.
The handwheel allows manual control for precise needle placement. The presser foot applies pressure to the fabric, and the needle plate supports the material during sewing. Identifying these parts is crucial for setup and maintenance.
Refer to online manuals and the Singer official website for detailed diagrams and component-specific information. Proper identification ensures efficient operation and troubleshooting.
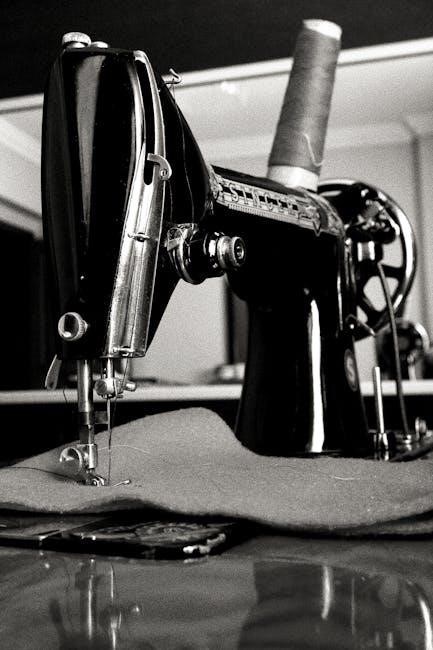
Identifying Key Parts: Spool Pin, Bobbin Winder, Handwheel
Let’s pinpoint essential Singer components. The spool pin, typically located at the top of the machine, securely holds the thread spool, allowing smooth unwinding during sewing. Next, the bobbin winder, often found on the right side, prepares the bobbin with thread for the lower stitch formation.
The handwheel, positioned on the right, provides manual control over the needle’s movement – crucial for precise starting and stopping. Understanding these parts, as of December 16, 2025, is fundamental.
Consult online resources and the official Singer website for visual aids and detailed explanations. Correct identification ensures proper machine operation and maintenance.
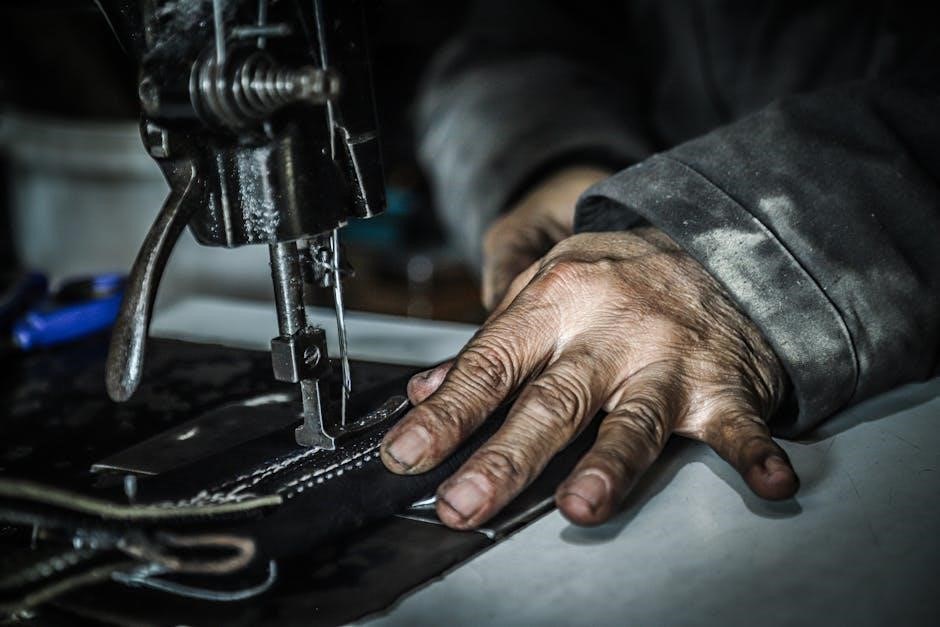
Understanding the Presser Foot & Needle Plate
The presser foot, situated beneath the needle, firmly holds fabric against the feed dogs, ensuring consistent stitch formation. Different presser feet exist for specialized tasks, enhancing sewing versatility. Below the presser foot lies the needle plate, featuring a hole guiding the needle’s ascent and descent.
Markings on the needle plate aid in accurate seam allowances. As of December 16, 2025, understanding their interaction is vital for quality sewing. Refer to your manual and online resources for detailed diagrams.
Proper alignment and selection of the correct presser foot are key to achieving professional results. Maintaining cleanliness is also crucial for smooth fabric movement.
Setting Up Your Machine
Proper setup is crucial for optimal sewing performance. Begin by ensuring your machine is on a stable surface. This comprehensive guide, current as of December 16, 2025, will walk you through the initial steps. First, you’ll need to wind the bobbin – a process detailed in the following section – and then thread the upper thread, following the numbered diagram in your manual.
Correct threading ensures even stitch tension. Always refer to your specific Singer model’s instructions, as threading paths can vary. A properly set-up machine is your partner in successful sewing!
Winding the Bobbin

Winding the bobbin correctly is fundamental to successful sewing. Place the spool of thread on the spool pin. Guide the thread through the thread guides, as illustrated in your Singer manual (updated December 16, 2025). Then, thread the end through the bobbin winder tension disc.
Securely place the bobbin onto the bobbin winder spindle. Engage the bobbin winder by pushing it to the right. Depress the foot pedal gently to begin winding. Once full, the winder will automatically stop. Remove the bobbin and you’re ready for threading!
Threading the Upper Thread
Proper upper threading is crucial for stitch formation. Begin by raising the presser foot and the needle to its highest position. Place your spool of thread on the spool pin. Following the threading diagram (refer to the manual dated 12/16/2025), guide the thread down through the first thread guide.

Continue threading through the tension discs, ensuring it’s firmly seated. Next, lead the thread through the take-up lever and down to the needle. Finally, thread the needle from front to back. A correctly threaded machine ensures smooth, consistent stitching.

Basic Sewing Techniques
Mastering fundamental techniques unlocks your sewing potential. Begin with understanding stitch formation, guided by your Singer manual (dated 12/16/2025). Practice straight stitching, maintaining a consistent seam allowance. This forms the basis for most projects.
Essential is learning to backstitch at the beginning and end of seams to secure the stitches, preventing unraveling. Proper tension and thread guidance, as detailed in the manual, are vital. These techniques, combined with consistent practice, will build confidence and precision in your sewing endeavors.
Straight Stitching: A Step-by-Step Guide
Begin by threading your Singer machine correctly, referencing your manual (dated 12/16/2025) for guidance. Ensure the presser foot is down and fabric positioned under it. Gently lower the needle into the fabric, then raise it.
Slowly depress the foot pedal, guiding the fabric with both hands – not pulling or pushing. Maintain a consistent speed for a uniform stitch. Backstitch at the start and end to secure the seam. Regularly check stitch quality, adjusting tension if needed, as outlined in the manual. Practice makes perfect!
Backstitching & Securing Seams

To reinforce seams, utilize backstitching. After sewing a few stitches forward, engage the reverse lever or button (consult your 12/16/2025 manual). Sew backwards over the last few stitches, then release the reverse and continue forward.
Repeat this process at the beginning and end of each seam. This prevents unraveling. Proper tension, as detailed in the manual, is crucial for secure backstitching. Always trim excess threads close to the fabric. Consistent backstitching creates durable, professional-looking results, ensuring your projects withstand wear and tear. Practice this technique for lasting seams!
Adjusting Stitch Length & Width
Your Singer machine, as outlined in the 12/16/2025 manual, allows customization of stitch length and width. Locate the corresponding dials or selectors – their positions vary by model. For stitch length, shorter stitches are ideal for delicate fabrics, while longer stitches suit heavier materials.
Width adjustments control the zigzag pattern’s breadth. Experiment with settings on scrap fabric to achieve desired results. Refer to the manual for recommended settings based on fabric type and sewing application. Precise adjustments enhance stitch quality and project aesthetics. Remember consistent testing is key!
Troubleshooting Common Issues
According to the Singer manual (dated 12/16/2025), thread breakage and skipped stitches are frequent concerns. For thread breakage, re-thread the machine, ensuring proper tension and guide alignment. Check the needle for damage or incorrect size. Skipped stitches often indicate a dull or bent needle; replace it immediately.
Ensure the bobbin is correctly inserted and the thread path is clear. Consult the manual’s diagrams for visual guidance. Consistent maintenance, like cleaning and oiling, prevents many issues. If problems persist, explore online support forums or contact Singer directly for assistance.
Dealing with Thread Breakage

As detailed in the Singer operation manual (12/16/2025), thread breakage is often resolved by re-threading both the upper thread and bobbin, verifying correct threading paths. Confirm the thread tension is appropriately adjusted – too tight or loose can cause breaks. Inspect the needle; a bent or damaged needle is a common culprit and requires replacement.
Ensure you’re using the correct needle type and size for your fabric. A frayed or low-quality thread also contributes to breakage. Regularly cleaning lint buildup around the tension discs is crucial. If issues continue, consult online resources or Singer’s official support.
Fixing Skipped Stitches
According to the Singer sewing machine operation manual (dated 12/16/2025), skipped stitches frequently indicate a problem with the needle. First, ensure the needle is correctly inserted – fully up into the clamp. Verify you’re using the appropriate needle type and size for your fabric weight. A dull or bent needle must be replaced immediately.
Check the threading; improper threading can disrupt the loop formation. Confirm the bobbin is correctly wound and inserted. Adjusting the upper thread tension slightly can sometimes resolve the issue. Regularly cleaning the machine, especially around the bobbin area, prevents lint buildup that causes problems.
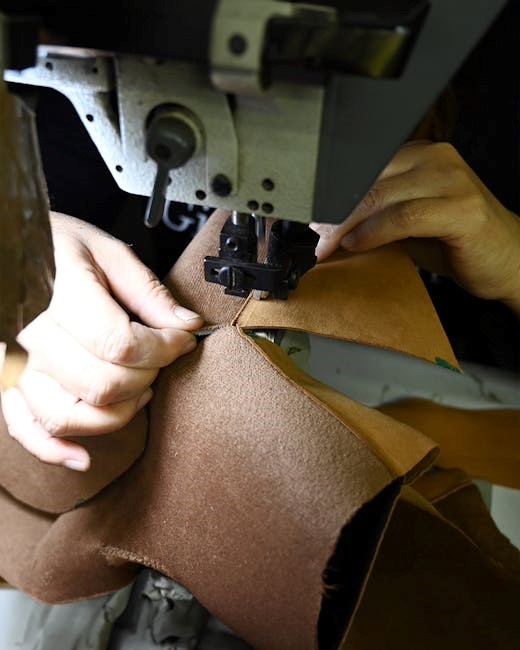
Presser Feet & Their Uses
As detailed in the Singer sewing machine operation manual (dated 12/16/2025), various presser feet expand your machine’s capabilities. The standard presser foot is your all-purpose tool for straight and zigzag stitching on most fabrics. For zippers, the zipper foot allows close stitching along the zipper teeth, providing professional results.
The buttonhole foot simplifies creating perfectly sized buttonholes. Additional feet, sold separately, cater to specific tasks like quilting, darning, or applying decorative trims. Correct foot selection is crucial for optimal stitch quality and fabric handling. Always refer to your manual for proper foot attachment and usage guidelines.
The Standard Presser Foot
According to the Singer sewing machine operation manual (dated 12/16/2025), the standard presser foot is the most versatile attachment, ideal for everyday sewing tasks. It’s designed for straight stitching, zigzag stitching, and general fabric manipulation. This foot ensures even fabric feed and consistent stitch formation on a wide range of materials.
Proper attachment is key; ensure it clicks securely into place. Adjust presser foot pressure based on fabric weight – lighter fabrics require lower pressure. Regularly inspect the foot for damage or buildup, cleaning as needed. Mastering the standard foot unlocks a foundation for all other sewing techniques, as outlined in the manual’s comprehensive guides.
Zipper Foot & Buttonhole Foot

As detailed in the Singer sewing machine operation manual (dated 12/16/2025), specialized presser feet expand your machine’s capabilities. The zipper foot, with its adjustable guide, allows precise stitching close to zipper teeth, creating professional-looking results. It’s crucial for both installing and replacing zippers efficiently.
The buttonhole foot facilitates perfectly sized buttonholes. The manual emphasizes selecting the correct foot for your machine model and buttonhole style. Practice on scrap fabric first! Proper alignment and consistent pressure are vital for clean, even buttonholes. These feet, alongside the standard foot, represent essential tools for diverse sewing projects, enhancing both speed and quality.
Maintaining Your Singer Sewing Machine
According to the Singer sewing machine operation manual (dated 12/16/2025), regular maintenance is vital for optimal performance and longevity. Consistent cleaning removes lint and debris, preventing jams and ensuring smooth operation. The manual stresses the importance of using a soft brush and occasionally applying sewing machine oil to key moving parts.
Belt replacement and tension adjustment are also covered. A worn belt impacts stitch quality, while proper tension ensures balanced thread distribution. Refer to the manual’s diagrams for correct belt installation and tension settings. Proactive maintenance, as outlined, avoids costly repairs and keeps your Singer machine running reliably for years.
Cleaning & Oiling
The Singer sewing machine operation manual (dated 12/16/2025) emphasizes regular cleaning to remove lint and dust buildup. This prevents jams and maintains smooth operation. Use a soft brush to clear debris from the bobbin area, feed dogs, and around the needle plate.
Oiling is equally crucial. Apply a few drops of sewing machine oil to oiling points – as illustrated in the manual – including the motor, gears, and moving parts. Avoid over-oiling, which can attract more lint. Consistent cleaning and proper lubrication, as detailed, ensure your Singer machine operates efficiently and extends its lifespan, guaranteeing reliable performance.
Belt Replacement & Tension Adjustment
According to the Singer sewing machine operation manual (dated 12/16/2025), a worn or broken belt necessitates replacement for proper machine function. The manual provides detailed diagrams illustrating the belt path and secure fastening.
Correct belt tension is vital. Too loose, and the machine lacks power; too tight, and it strains the motor. Adjust tension using the tension screw, ensuring the handwheel turns smoothly with slight resistance. Proper tension, alongside a correctly installed belt, guarantees optimal stitching and prevents damage. Refer to the manual’s illustrations for precise adjustment guidance, maintaining peak performance.
Advanced Techniques (Zigzag Stitch & More)
The Singer sewing machine operation manual (dated 12/16/2025) unlocks a world beyond straight stitching. Mastering the zigzag stitch allows for decorative applications, seam finishing, and stretch fabric sewing. Adjust stitch width and length for varied effects, detailed within the manual’s instructions.
Explore techniques like darning, appliqué, and free-motion embroidery, expanding your creative possibilities. The manual guides you through setting appropriate stitch parameters for each technique. Utilizing different presser feet, as outlined in the manual, further enhances precision and control. These advanced skills transform your Singer into a versatile crafting tool.
Understanding Different Singer Models (99K Focus)
The Singer sewing machine operation manual (dated 12/16/2025) acknowledges the diversity within the Singer family. While principles remain consistent, specific features vary between models. This section focuses on the iconic Singer 99K, a popular choice noted for its robust construction and reliable performance.
The manual details the 99K’s unique characteristics, including its specific bobbin system and stitch plate options. Understanding these nuances ensures optimal operation and maintenance. Resources, including online manuals and support forums (mentioned in the manual), offer 99K-specific troubleshooting advice. Familiarizing yourself with your model’s specifics maximizes its potential.
Resources & Further Learning
As highlighted in the Singer sewing machine operation manual (dated 12/16/2025), continuous learning enhances your sewing experience. Numerous resources are available beyond this guide. Explore online manuals and active support forums, offering solutions to common issues and a community of fellow enthusiasts.
The Singer official website provides comprehensive support, including downloadable manuals, FAQs, and contact information for direct assistance. (manuals_contributions; manuals; additional_collections) are also valuable. Consider online tutorials and workshops to expand your skills. Remember, mastering your machine is a journey – utilize these resources to unlock its full potential and enjoy creative success!
Online Manuals & Support Forums
Referencing the Singer sewing machine operation manual (dated 12/16/2025), accessing online resources significantly expands your support network. Numerous websites host downloadable manuals for various Singer models, including the 99K (Singer 99K Addeddate 2025-03-29).
Support forums are invaluable for troubleshooting, sharing tips, and connecting with experienced users. These communities often provide solutions to problems not covered in the printed manual. (manuals_contributions) are frequently shared. Search for dedicated Singer sewing machine groups on platforms like Facebook and dedicated sewing forums to benefit from collective knowledge and assistance.
Singer Official Website & Contact Information
As highlighted in the Singer sewing machine operation manual (dated 12/16/2025), the official Singer website is a primary resource for comprehensive support. It offers downloadable manuals, FAQs, and troubleshooting guides for a wide range of models. (Singer Official Website) provides access to the latest information and updates.
For direct assistance, Singer offers customer support via phone and email. Contact information is readily available on their website. (Contact Information) allows you to connect with trained professionals who can address specific issues. Utilizing these official channels ensures accurate and reliable guidance for your sewing machine needs, complementing the information within your manual.