simpson pressure washer 2800 psi manual

Simpson Pressure Washer 2800 PSI: A Comprehensive Guide
Welcome! This detailed manual provides essential guidance for operating and maintaining your Simpson 2800 PSI pressure washer, ensuring optimal performance and longevity.
Congratulations on purchasing the Simpson 2800 PSI pressure washer! This powerful cleaning machine is designed to tackle a wide range of outdoor tasks, from washing vehicles and siding to cleaning decks and driveways. This introduction will briefly outline the capabilities of your new pressure washer and highlight its key benefits.
The 2800 PSI rating indicates the water pressure output, providing substantial cleaning force; Coupled with a flow rate of 2.4 GPM (gallons per minute), it efficiently removes dirt, grime, and mildew. This model balances power with user-friendliness, making it suitable for both novice and experienced users.
Before operation, carefully review this manual to understand all safety precautions and operating procedures. Proper use and maintenance will ensure years of reliable service. We’ll cover everything from setup and operation to troubleshooting and winter storage, empowering you to maximize the potential of your Simpson pressure washer.
What’s Included in the Box? ⎻ Unboxing & Components
Let’s begin by verifying the contents of your Simpson 2800 PSI pressure washer package. Carefully unpack the box and ensure all listed components are present. You should find the following:
- Pressure Washer Unit: The main engine and pump assembly.
- High-Pressure Hose: Connects the pump to the spray wand.
- Spray Wand: The handle used to direct the water stream.
- Spray Nozzles: A set of interchangeable nozzles for various cleaning tasks (0°, 15°, 25°, 40°, Soap).
- Detergent Tank: A container for holding cleaning solutions.
- Quick Connect Fittings: For easy attachment of hoses and nozzles.
- Engine Oil: Sufficient oil for initial operation.
- Owner’s Manual: This comprehensive guide.
If any components are missing or damaged, do not operate the pressure washer. Contact Simpson’s customer support immediately for assistance. Retain the packaging for potential returns or warranty claims.

Understanding Your Pressure Washer
Familiarize yourself with the core functionalities of your Simpson 2800 PSI unit; knowledge empowers safe and effective cleaning operations consistently.
Key Features of the Simpson 2800 PSI Model
This Simpson pressure washer boasts a powerful 2800 PSI at 2.4 GPM delivered by a reliable axial cam pump, ensuring robust cleaning capability for various tasks around your property. The durable steel frame construction provides stability and longevity, withstanding demanding use.
It features a 1.3-gallon detergent tank, allowing for extended soap application without frequent refills, ideal for car washing or siding cleaning. The quick-connect nozzles offer effortless switching between different spray patterns, adapting to diverse cleaning needs.
Furthermore, the ergonomic spray gun with a safety lock minimizes fatigue during prolonged use and prevents accidental activation. Large pneumatic tires enhance maneuverability across uneven terrain. This model includes a thermal relief valve protecting the pump from overheating, extending its lifespan. The Simpson 2800 PSI is designed for both homeowners and professionals seeking a dependable and versatile cleaning solution.
Safety Precautions ⎻ Before You Begin
Prior to operating your Simpson 2800 PSI pressure washer, carefully read and understand all instructions within this manual. Always wear safety glasses or goggles to protect your eyes from debris. Securely wear closed-toe shoes to prevent foot injuries. Never point the wand at yourself or others.
Ensure the work area is clear of people, pets, and obstacles. Avoid operating the pressure washer near electrical outlets or flammable materials. Do not tamper with safety devices or alter the factory settings. Always disconnect the power source before performing any maintenance.
Be mindful of the high-pressure spray, which can cause serious injury. Never use the pressure washer on electrical components. If using extension cords, ensure they are rated for outdoor use and the appropriate gauge. Keep children away from the operating area; Always relieve pressure before disconnecting hoses or nozzles.
Pressure Washer Terminology ‒ PSI, GPM, and Nozzles
Understanding key terms is crucial for effective operation. PSI (Pounds per Square Inch) measures the water pressure – the Simpson 2800 PSI delivers 2800 PSI for robust cleaning power. GPM (Gallons Per Minute) indicates the water flow rate, impacting cleaning speed and efficiency.
Nozzles control the spray pattern and intensity. A 0° nozzle creates a concentrated stream for stubborn dirt, while a 40° nozzle provides a wider, gentler spray for delicate surfaces. 15° and 25° nozzles offer intermediate cleaning options.

The soap nozzle is designed for applying detergent effectively. Lower PSI/GPM combinations are ideal for lighter tasks, while higher settings tackle tougher grime. Selecting the correct nozzle and adjusting pressure are vital for achieving optimal results without causing damage. Familiarize yourself with these terms to maximize your pressure washing experience.

Setting Up Your Simpson 2800 PSI
Preparation is key! Carefully follow these steps to correctly assemble your Simpson 2800 PSI pressure washer for safe and efficient operation.
Connecting the Water Supply
Essential First Step: Before starting your Simpson 2800 PSI pressure washer, a reliable water supply is crucial. Ensure your water source provides at least 20 PSI and a flow rate of 2.5 GPM.
Hose Connection: Attach a garden hose (not included) to the water inlet on the pressure washer. Hand-tighten securely, then use a wrench for a quarter turn more – avoid over-tightening!
Water Source Considerations: If using a well, a filter is recommended to prevent debris from entering the pump. Always check for kinks or obstructions in the hose.
Initial Priming: Turn on the water supply fully. The pressure washer may require a brief period to prime, meaning the pump fills with water. You’ll know it’s primed when water flows freely from the spray wand after starting the engine.
Important Note: Never operate the pressure washer without water connected, as this will cause severe damage to the pump.
Attaching the High-Pressure Hose
Critical Connection: The high-pressure hose is vital for delivering water to the spray wand. Locate the high-pressure hose included with your Simpson 2800 PSI pressure washer.
Secure Attachment: First, firmly connect one end of the hose to the high-pressure outlet on the pump. Hand-tighten, then use a wrench for a snug fit – again, avoid over-tightening.
Wand Connection: Next, attach the other end of the high-pressure hose to the spray wand. Ensure a secure connection by aligning and twisting until it clicks into place. A safety lock mechanism may be present; confirm it’s engaged.
Inspection is Key: Before operation, carefully inspect the hose for any cracks, kinks, or damage. A damaged hose must be replaced immediately.
Caution: Never attempt to disconnect the high-pressure hose while the pressure washer is running.
Installing the Spray Wand and Nozzles
Wand Integration: After connecting the high-pressure hose, securely attach the spray wand to the trigger gun. A quick-connect mechanism usually facilitates this – simply push and twist until it locks. Verify a firm connection before proceeding.
Nozzle Selection: Your Simpson 2800 PSI comes with a variety of nozzles, each designed for different cleaning tasks. Choose the appropriate nozzle based on your surface and desired cleaning intensity.
Nozzle Installation: To install a nozzle, align it with the nozzle holder on the spray wand and firmly push it in until it clicks. Ensure it’s fully seated to prevent it from dislodging during operation.
Safety First: Always release the trigger lock before changing nozzles. Never point the wand at yourself or others during nozzle changes.
Secure Check: Double-check that the nozzle is securely attached before starting the pressure washer.
Adding Detergent ⎻ Soap Dispenser Setup
Locating the Detergent Tank: Your Simpson 2800 PSI features a dedicated detergent tank, typically located near the unit’s base. Identify this tank before beginning the detergent setup.
Filling the Tank: Carefully remove the detergent tank cap and fill it with a pressure washer-specific detergent. Do not use household cleaners, as they can damage the pump.
Tank Re-attachment: Securely reattach the detergent tank cap, ensuring a tight seal to prevent leaks during operation.
Soap Dispenser Adjustment: Locate the detergent flow control knob, usually situated near the detergent tank or trigger gun. Adjust this knob to control the detergent concentration.
Testing the Flow: Select the soap nozzle (typically black-colored) and test the detergent flow. Adjust the flow control knob until you achieve the desired foam level.

Operating Instructions
Begin with caution! Always follow safety guidelines, select the appropriate nozzle, and ensure a stable surface before initiating the pressure washing process.
Starting the Engine ‒ Cold Start Procedure
Initial Startup: For a cold start, verify the fuel tank contains fresh gasoline and the oil level is correct. Turn the fuel valve to the ‘ON’ position. Slowly move the choke lever to the ‘CHOKE’ setting – this enriches the fuel mixture for easier ignition.
Pulling the Cord: Gently pull the starter cord until you feel resistance, then pull firmly and smoothly to initiate the engine. Avoid retracting the cord quickly; allow it to rewind slowly. If the engine doesn’t start after a few attempts, repeat the process, potentially adjusting the choke slightly.
Warm-Up Phase: Once the engine starts, gradually move the choke lever back to the ‘RUN’ position as the engine warms up. Allow the pressure washer to run for a few minutes to stabilize before connecting the high-pressure hose and beginning your cleaning task. Never operate the unit indoors or in poorly ventilated areas.
Adjusting Pressure Settings
Pressure Control Knob: Your Simpson 2800 PSI pressure washer features a pressure control knob, allowing you to tailor the cleaning force to the specific task. Rotating the knob clockwise increases the pressure, while rotating it counter-clockwise decreases it.
Start Low, Test Gradually: Always begin with the lowest pressure setting and gradually increase it until you achieve the desired cleaning result. This prevents damage to delicate surfaces. For tasks like washing a car, a lower pressure is recommended. For stubborn grime on concrete, a higher setting may be necessary.
Observe the Surface: Continuously monitor the surface you are cleaning. If you notice any etching, peeling paint, or other signs of damage, immediately reduce the pressure. Proper pressure adjustment is crucial for effective cleaning and preventing damage.
Selecting the Right Nozzle for the Job
Nozzle Color-Coding: Your Simpson 2800 PSI pressure washer comes with a set of quick-connect nozzles, each color-coded to indicate its spray angle and cleaning power; Understanding these differences is vital for optimal results and surface protection.
Consider the Surface: Delicate surfaces like painted wood or vinyl siding require wider-angle nozzles (25° or 40°) to prevent damage; Hard surfaces like concrete and brick can withstand narrower angles (0° or 15°) for more aggressive cleaning.
Experiment & Observe: Don’t hesitate to experiment with different nozzles to find the best setting for your specific cleaning task. Always test in an inconspicuous area first. The soap nozzle is specifically designed for applying detergent effectively, creating a rich lather.
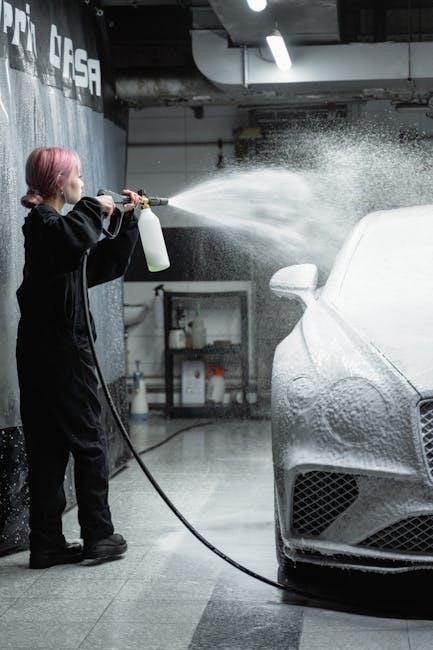
Proper Spraying Techniques ⎻ Distance & Angle
Maintaining Optimal Distance: Holding the spray wand at the correct distance from the surface is crucial. Generally, start with the wand approximately 8-12 inches away and adjust as needed. Closer distances increase cleaning power but also risk damage.
Spray Angle Matters: A consistent spray angle ensures even cleaning. Aim for a slight downward angle, working from top to bottom to avoid streaking. Avoid directly spraying upwards under surfaces, as this can force water into sensitive areas.
Sweeping Motion: Utilize a slow, sweeping motion, overlapping each pass slightly. This prevents leaving visible lines and ensures thorough cleaning. Never remain in one spot for too long, as this can etch or damage the surface. Always prioritize safety and wear appropriate eye protection.

Maintenance & Troubleshooting
Regular upkeep extends your Simpson 2800 PSI’s life. This section details routine checks, oil changes, and solutions for common operational issues.
Routine Maintenance ⎻ Cleaning & Storage
Maintaining cleanliness is crucial for your Simpson 2800 PSI pressure washer’s longevity. After each use, disconnect the water supply and high-pressure hose. Thoroughly flush the pump with clean water by running the unit for a minute with the soap nozzle attached – this prevents detergent buildup and corrosion.

Wipe down the exterior surfaces with a damp cloth to remove dirt and debris. Inspect the high-pressure hose for any signs of wear or damage, and replace it if necessary. For storage, ensure the unit is completely dry. Store it in a clean, dry location, protected from freezing temperatures.
Avoid storing the pressure washer directly on the ground; use a pallet or wooden blocks. Before long-term storage (over winter), consider using a pump protector to prevent internal damage. Always refer to the full manual for detailed instructions and safety precautions regarding cleaning and storage procedures.
Changing the Oil ⎻ Step-by-Step Guide
Regular oil changes are vital for engine health. First, warm up the engine briefly (around 5 minutes). Locate the oil drain plug, typically on the lower part of the engine. Place an approved oil drain pan underneath. Carefully remove the drain plug, allowing the old oil to completely drain – this may take 15-20 minutes.
Once drained, reinstall the drain plug, ensuring it’s tightened securely. Locate the oil fill cap and remove it. Using a funnel, slowly pour in the recommended oil type and quantity (refer to the specifications section of this manual). Do not overfill!
Replace the oil fill cap and wipe away any spilled oil. Properly dispose of the used oil at a designated recycling center. Check the oil level with the dipstick before each use. Always consult the full manual for specific oil recommendations and safety guidelines.
Replacing the Spark Plug
A fouled or worn spark plug can cause starting difficulties and reduced engine performance. First, ensure the engine is completely cool. Locate the spark plug, usually covered by a protective cap. Remove the cap and carefully disconnect the spark plug wire – pull from the boot, not the wire itself.
Using a spark plug socket, loosen and remove the old spark plug. Inspect the new spark plug for damage and ensure it has the correct gap (refer to the specifications). Carefully thread the new spark plug into the engine by hand to avoid cross-threading.
Once hand-tight, use the spark plug socket to tighten it to the manufacturer’s specified torque. Reconnect the spark plug wire securely. Replace the protective cap. Always consult the full manual for the correct spark plug type and torque specifications.
Troubleshooting Common Issues ‒ No Start, Low Pressure
No Start: Check fuel level and ensure the fuel valve is open. Verify the spark plug wire is securely connected and the spark plug isn’t fouled (see ‘Replacing the Spark Plug’). Confirm the engine shut-off switch is in the ‘Run’ position. A clogged air filter can also prevent starting.
Low Pressure: Inspect the water inlet screen for obstructions. Ensure a sufficient water supply is connected and fully open. Check the high-pressure hose for kinks or damage. Examine the nozzles for clogs – clean or replace as needed. A worn pump or low oil level can also cause low pressure; consult a qualified technician.
Always refer to the full manual for detailed diagnostics and safety precautions before attempting any repairs.
Winterizing Your Pressure Washer ⎻ Preventing Freeze Damage
Protecting against freezing temperatures is crucial! First, disconnect the water supply and drain all remaining water from the pump and hose. Use a pump saver kit (antifreeze) following the kit’s instructions – this protects internal pump components. Disconnect and drain the high-pressure hose, storing it indoors.
Empty the detergent tank completely. Change the engine oil (see ‘Changing the Oil’) to remove corrosive acids. Remove the spark plug and pour a tablespoon of engine oil into the cylinder, then slowly pull the starter cord to distribute. Store the pressure washer in a dry, protected location.
Failure to winterize can result in severe and costly damage!

Nozzle Guide & Applications
Selecting the correct nozzle is key! This section details each nozzle’s spray pattern and ideal applications for your Simpson 2800 PSI pressure washer.
0° Nozzle ⎻ For Intense Cleaning
Caution: The 0° nozzle delivers a highly concentrated, powerful stream of water. It’s designed for the most stubborn dirt, grime, and paint removal, but requires extreme care to prevent damage.
Applications: Use this nozzle on concrete, heavily soiled surfaces, and for stripping old paint. It’s effective for removing graffiti, rust stains, and built-up grease. However, never use it on wood, vinyl siding, car paint, or any delicate surface – it will cause significant damage.
Technique: Maintain a safe distance (at least 12 inches, and potentially further) and use sweeping motions. Avoid prolonged exposure to a single spot. Always test in an inconspicuous area first to assess the impact. Wear safety glasses and appropriate protective gear. Improper use can lead to injury or surface damage. Remember, this nozzle is for experienced users only and demands respect for its power.
15° Nozzle ‒ General Purpose Cleaning
Versatility Defined: The 15° nozzle is your go-to for a wide range of cleaning tasks around the home and property. It strikes a balance between cleaning power and surface protection, making it suitable for numerous applications.
Ideal For: This nozzle excels at cleaning siding, brick, concrete driveways and patios, garden furniture, and even vehicles. It effectively removes dirt, mildew, and light grime without being overly aggressive. It’s a great starting point for most cleaning projects.
Best Practices: Hold the nozzle approximately 8-12 inches from the surface and use smooth, overlapping strokes. Adjust the distance based on the level of dirt and the surface material. Always test in an inconspicuous area first. For tougher stains, you may need to slow down your pace or increase the pressure slightly. Remember to wear safety glasses for eye protection.
25° Nozzle ⎻ Wider Coverage, Moderate Cleaning
The Sweet Spot: The 25° nozzle offers a fantastic compromise between cleaning power and coverage area, making it incredibly versatile for many outdoor cleaning jobs. It’s less aggressive than the 15° nozzle, reducing the risk of damage to softer surfaces.
Perfect Applications: Use this nozzle for cleaning larger areas like decks, fences, and painted surfaces. It’s also excellent for washing cars, boats, and RVs, providing a thorough clean without stripping paint or causing scratches. It’s a reliable choice for routine maintenance.

Technique Tips: Maintain a distance of 12-18 inches from the surface. Employ broad, sweeping motions to cover larger areas efficiently. For stubborn dirt, consider a closer distance and slower pace. Always prioritize safety by wearing appropriate eye protection and avoiding direct contact with people or pets.
40° Nozzle ⎻ Delicate Surfaces & Rinsing
Gentle Power: The 40° nozzle delivers the lowest pressure of the standard spray nozzles, making it ideal for cleaning delicate surfaces that could be easily damaged by higher PSI. It’s your go-to option when a gentle touch is required.
Ideal Uses: This nozzle excels at cleaning siding, windows, and automotive paint without causing harm. It’s also perfect for rinsing away soap and debris after cleaning, leaving a spotless finish. Consider it for fragile items or areas needing a light wash.
Best Practices: Hold the nozzle closer to the surface – typically 6-12 inches – for effective cleaning. Use slow, controlled movements to avoid uneven cleaning. This nozzle is also excellent for applying a final rinse to remove any remaining residue. Always test in an inconspicuous area first!
Soap Nozzle ‒ Applying Detergent Effectively
Detergent Delivery: The soap nozzle, typically white in color, is specifically designed for applying detergent or soap to surfaces during the cleaning process. It creates a low-pressure, high-volume spray that effectively mixes the cleaning solution with water.
Proper Usage: Ensure the soap dispenser is filled with a pressure washer-approved detergent. Attach the soap nozzle to the wand. The machine will automatically draw the detergent when this nozzle is engaged – no need to manually mix!
Application Tips: Apply the soap evenly across the surface, working from bottom to top to prevent streaking. Allow the detergent to dwell for a few minutes (refer to the detergent’s instructions) before rinsing with a different nozzle (like the 25° or 40°); Avoid using harsh chemicals not designed for pressure washers.
Warranty Information & Support
Simpson Warranty: Your Simpson 2800 PSI pressure washer is covered by a manufacturer’s warranty against defects in materials and workmanship. The standard warranty period is typically one year from the date of purchase for parts and 90 days for labor.
Warranty Exclusions: This warranty does not cover damage resulting from misuse, abuse, neglect, improper maintenance, or normal wear and tear. Modifications or repairs performed by unauthorized personnel will void the warranty.
Customer Support: For warranty claims, technical assistance, or replacement parts, please contact Simpson’s customer support team. Visit www.simpsoncleaning.com or call 1-800-221-9376. Keep your purchase receipt as proof of purchase. Detailed warranty terms and conditions are available online.